Setting Up Closed Captioning in Zoom
In meetings, a host or another meeting participant assigned by the host can provide captioning. For webinars, captioning can only be provided by the host or a panelist. Captioning is also viewable in Zoom rooms.
How to Start Captioning in a Meeting or Webinar
- Start the Zoom meeting or webinar you are hosting.
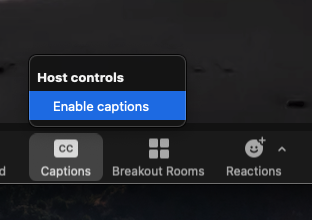
- In the meeting controls toolbar, click the up-arrow icon next to the Show Captions icon (CC).
- Under Host controls, click Enable captions.
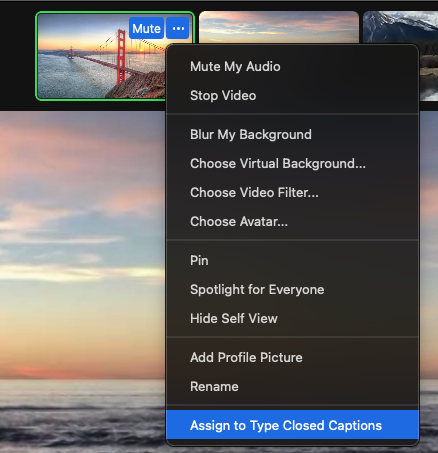
- Find the captioner’s video in the gallery and select More to view additional options.
- Select Assign to type Closed Captions.

- The captioner will then be notified that they have been assigned to caption the meeting.
Please note, only one captioner can be assigned to a Zoom meeting or webinar. If you are planning on utilizing breakout rooms, ask the Deaf participant which breakout session they will be attending before the meeting or webinar. Request the captioner also enter this Zoom room when breakout sessions begin, so they can continue captioning and there is no lapse of services.
How to Find the API Token
- Start the Zoom meeting or webinar you are hosting.
- In the meeting controls toolbar, click the up-arrow icon next to the Show Captions icon (CC).
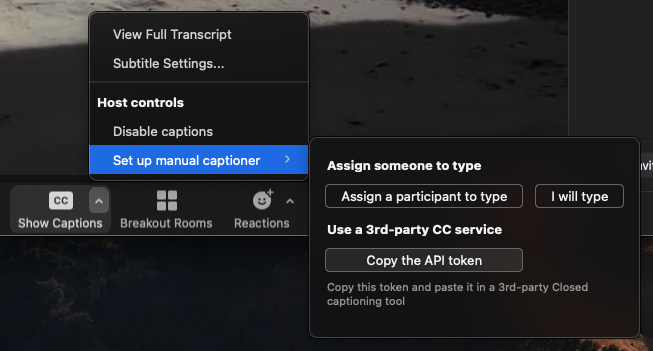
- Under Host controls, click Set up manual captioner.
- Select Copy the API token.

- Copy the URL.
- Provide the URL to the DSU coordination team so they can integrate the closed captioning services into your meeting.